Friday, May 31, 2013

Create a Point Cloud by using the DepthToPoints Node

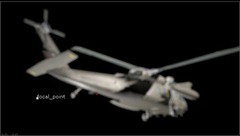
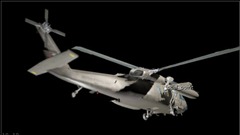
The DepthToPoints gizmo is used to generate a 3D point cloud from a depth pass and 3D camera. This gizmo takes the color and depth information in the image and then creates the image as a 3D point cloud. Then, you can use the points in the point cloud to line up any geometry in the 3D space. Make sure that the alpha channel of the image is not set to black. Figures 1 and Figure 2 display the color and depth information of an input image.
Figure 1
Figure 2
To generate a point cloud using DepthToPoints gizmo, you need to follow the steps given below:

Step - 1
Export a camera chan file from your 3D application.

Step - 2
Read in the input image having depth channel embedded in it; the Read1 node will be inserted into the Node Graph panel.

Step - 3
Add a DepthToPoints node from the 3D > Geometry menu; the DepthToPoints1 node will be inserted in the Node Graph panel.

Step - 4
Make a connection between the image input of the DepthToPoints1 node and Read1 node. If image contains normal data, connect it with the norm input of the DepthToPoints1 node.

Step - 5
Click on the empty area of the Node Graph panel and then add a Camera node from the 3D menu; the Camera1 node will be inserted in the Node Graph panel.

Step - 6
In the Camera tab of the Camera1 node properties panel, click on the file_menu icon; a flyout will be displayed.

Step - 7
Choose the Import chan file option from the flyout; the Chan File dialog box will be displayed. In this dialog box, navigate to the location where you saved the chan file and then select it. Next, choose the Open button from the dialog box.

Step - 8
Select the DepthToPoints1 node in the Node Graph and then press 1 to view the output in the Viewer1 panel. You will notice that point cloud is displayed in the Viewer1 panel but the position of the cloud is not proper. We need to connect the chan camera data to the DepthToPoints1 to get the correct camera angle.

Step - 9                                  
In the User tab of the DepthToPoints1 node properties panel, select the depth channel from the depth drop-down.

Step - 10
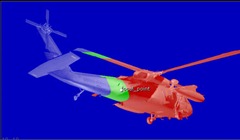
Connect the camera input of the DepthToPoints1 node with the Camera1 node; the point cloud will be displayed in the Viewer1 panel, refer to Figure 3.
Figure 3
By default, the DepthToPoints node displays the point cloud in a solid color. If you want to display the outline of the geometry in the Viewer panel, select the wireframe option from the display drop-down, refer to Figure 4.
Figure 4
Step - 11
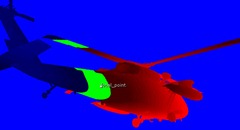
Enter 0.1 in the point detail field; the density of the point cloud will change in the Viewer1 panel, refer Figure 5.
Figure 5
If you set the value 1 for the point detail field, all available points will be displayed in the Viewer panel. If you want to change the size of the points, enter a value in the point size field. Now, you can place a 3D geometry in the 3D space with help of the point cloud.

Thursday, May 30, 2013

Working with the ZDefocus node in Nuke 7 Part - 2

In continuation with the Part - 1 of this article, we will work with the remaining options available in the ZDefocus node properties panel. Read Part - 1 here.

Step - 1
Navigate to the following link and then download the image with the name city_illumination.jpg on your hardd drive.

Step – 2
Load the city_illumination.jpg file into the script; the Read1 node will be inserted in the Node Graph panel.

Step – 3
Make sure the Read1 node is selected and then press 1 to view its output in the Viewer1 panel, refer to Figure 1.
Figure 1
Step - 4
Connect a ZDefocus node to the Read1 node. You will notice an error message in the Viewer1 panel about the missing depth channel. This error is generated because by default the ZDefocus node looks for depth information in the depth.z channel which is selected by default in the depth channel drop-down and there is no depth channel available in the city_illumination.jpg file.

Step - 5
In the ZDefocus tab of the ZDefocus node properties panel, select rgba.alpha from the depth channel drop-down; an error message will be displayed in the Viewer1 panel about missing alpha channel.

Step - 6
In the Read1 node properties panel, select the auto alpha check box. You will notice in the Viewer1 panel that highlights are now out of focus, as shown in Figure 2.
Figure 2
By default, the disc option is selected in the filter type drop-down. As a result, a round disc filter will be applied to the image. The filter shape parameter is used to dissolve the shape between 0 (gaussian, blobby shape)  to 1(disc) range.

Step - 7
Enter 2 in the aspect ratio field. You will notice the cat's eye type effect in the Viewer1 panel, as shown in Figure 3.
Figure 3
The aspect ratio parameter controls the aspect ratio of the filter. The default ratio is 1:1.

Step - 8
Enter 1 in the aspect ratio field. Next, select bladed from the filter type drop-down; the highlights in the Viewer1 panel will displayed in shape of iris blades, as shown in Figure 4.
Figure 4
Step - 9
Enter 3 in the bladed field; the highlights in the Viewer1 panel will display in the shape which is made of 3 iris blades, as shown in Figure 5.
Figure 5
The roundness parameter is used control the rounding of the polygon edges of the filter. If you set zero value for this parameter, no rounding will occur. The rotation parameter is used to define the rotation of the filter in degrees. The inner size parameter is used to control the size of the inner polygon. The inner feather parameter is used to add feathering around the outward and inward edges of the inner polygon. The inner brightness controls the brightness of the inner polygon. Adjust these parameter as per your requirement.

Step - 10
Select the catadioptric check box. This check box is used to produce annular defocused areas thus producing the donut-shaped highlights. The catadioptric parameter is used to control the catadioptric hole in the bokeh. This parameter will only be available, if you select the catadioptric check box. Figure 6 shows the bokeh created using the following values:

filter type: bladed
aspect ratio: 1.04
blades: 7
roundness: 0
roatation: 66
inner size: 0.105
inner feather: 0.285
inner brightness: 0.07
catadioptric: Selected
catadioptric size: 0.41
Figure 6
Step - 11
Select the gamma correction check box; a gamma curve of 2.2 will be applied on the image before blurring and then reversed for the final result. This will make the bokeh more pronounced, as shown in Figure 7.
Figure 7
Step - 12
Check the bloom check box to make the highlights more visible. When you select the check box, the bloom threshold and bloom gain parameters will become active. The highlights above the value specified by the bloom threshold value will be multiplied with the values specified for the bloom gain parameter.

Step - 13
Enter 0.88 and 2.44 in the bloom threshold and bloom gain parameters, respectively. Figure 8 shows the highlights after entering the value.
Figure 8
If you select filter shape setup from the output drop-down, the filter shape which is responsible for the shape of  the highlights will be displayed in the Viewer1 panel, as shown in Figure 9.
Figure 9
Step - 14
Select bladed from the filter type drop-down and then adjust the parameter corresponding to bladed filter type. You will notice the change in the shape in the Viewer1 panel.

Next, you will apply a custom filter to the ZDefocus node. You can create a filter image using a Flare or Roto node.

Step - 15
Rest the ZDefocus node properties. Next, select rgba.alpha from the depth channel drop-down.

Step - 16
Click on the empty area of the Node Graph panel and then add Constant node. Next, set its size to 255x255. The added Constant1 node will act as a place holder for the Flare node.

Step - 17
Make sure the Constant1 node is selected in the Node Graph panel and then connect a Flare node with it. Next, press 1 to view the output of the Flare1 node in the Viewer1 panel.

Step - 18
In the Viewer1 panel, use the position widget to position the flare at the center of the Constant node's result.

Step - 19
In the Flare tab of the Flare1 node properties panel, enter 16 and 1 in the edge flattening and corner sharpness parameters, respectively.

Step - 20
Connect the filter input of the ZDefocus1 node with the Flare1 node.

Step - 21
Select the ZDefocus1 node and then press 1 to view its output.

Step - 22
In the ZDefocus1 node properties panel, select image from the filter type drop-down; an error message will be displayed in the Viewer1 panel because the filter image has no alpha channel embedded in it. To rectify it, select rgba.red from the filter channel drop-down.

You will  notice in the Viewer1 panel that the shape of the highlights is changed according to the output of the Flare1 node.

This concludes part - 2 of "Working with ZDefocus node".

Wednesday, May 29, 2013

Working with the ZDefocus node in Nuke 7 Part - 1

The ZDefocus node is a major upgrade to the ZBlur node. The ZDefous node is used to blur an image according to the depth map channel and gives you ability to simulate blur using depth of field. This node splits the input image into layers. All pixels have the same depth value within a layer. Also, the whole layer receives same amount of blur size. After processing all the layers present in the input image, the ZDefocus blends layers together from back to the font of the image thus preserving the order of the elements in the scene.

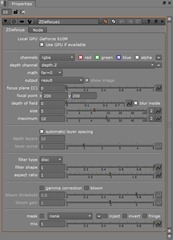
To add a ZDefocus node to the Node Graph panel, select the input image that you need to blur and then choose the Filter button to display the Filter menu. Next, choose ZDefocus from the menu; the ZDefocus# node will be inserted in the Node Graph panel. Also, The ZDefocus# node properties panel will be displayed with the ZDefocus tab chosen in the Properties Bin, refer to Figure 1.
art21-1
Figure 1
You notice in the Node Graph panel that the apart from the regular mask and Output connectors, the ZDefocus# node has two more input connectors: filter and image. These are discussed next:

filter: This image connected to this input takes the shape of the out of focus highlights. These highlights are also referred to as “Bokeh”. You can use a Roto or Flare node to create the filter image. If you want to add color fringing to Bokeh, you can use also connect a color image to the filter input.

image: This input is used to connect to to the input image that you want to blur. Make sure that this image contains a depth channel.

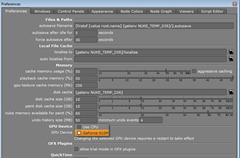
You will also notice a focal point widget in the Viewer# panel. This widget is used to adjust the position of the focal plane. On moving this widget, the focus plane and focal point parameters update automatically. If you select the Use GPU if available check box in the node properties panel, the processing of the node is run on the GPU instead of CPU. If GPU is present in the scene, its name will be displayed above the check box, refer to Figure art21-1. You can also select which GPU you need to use. To do so, open the Preferences dialog box by pressing SHIFT+S and then choose the desired option from the GPU Device drop-down of the GPU Device area, refer to Figure 2.
art21-2
Figure 2
Before moving farther, navigate to http://www.mediafire.com/download/lpbg7sv7lf7hlz2/art021.zip and download the zip file. Next, extract the contents of the zip file to your hard drive. The zip file contains the chopper.exr file which we will used to explain the concepts here.

Step – 1
Lunch Nuke and start a new script in it.

Step – 2
Load the chopper.exr file into the script; the Read1 node will be inserted in the Node Graph panel.

Step – 3
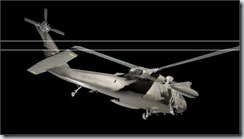
Make sure the Read1 node is selected and then press 1 to view its output in the Viewer1 panel, refer to Figure 3.

Step – 4
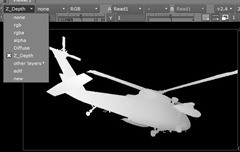
Select Z_Depth from the Channel Sets drop-down; the depth channel will be displayed in the Viewer1 panel, refer to Figure 4. Now, select rgba from the Channel Sets drop-down.
art21-3
Figure 3
art21-4
Figure 4
Step – 5
Connect a ZDefocus node to the Read1 node. You will notice an error message in the Viewer1 panel about the missing depth channel. This error is generated because by default the ZDefocus node looks for depth information in the depth.z channel which is selected by default in the depth channel drop-down.

Step – 6
Select Z_Depth.red from the depth channel drop-down; you will notice blur in the Viewer1 panel, refer to Figure 5.

The options in the channels drop-down located above the depth channel drop-down are used to select channels on which the blur will be applied.

Step – 7
In the Viewer1 panel, move the focal point widget to the front part of the chopper; the area around the point will be in focus immediately, refer to Figure 6.
art21-5
Figure 5
art21-6
Figure 6
Step – 8
Select depth from the math drop-down.

The options in math drop-down are used to specify the method that will be used to calculate the distance between the camera and the object using the information available in the depth channel. If you hove the mouse pointer over the math drop-down, a tooltip will appear with information about the formula used to calculate the blur. By default, the far=0 option is selected in this drop-down. This option is compatible with the depth maps generated using Nuke and RenderMan.

Step – 9
Enter 0.1, 8, and 10 in the depth of field, size, and maximum fields, respectively.

The depth of field parameter is used to specify the depth of field around the focus plane. The size parameter is used to set the size of the blur. The size of the blur is clipped at the value specified using the maximum parameter. The blur inside check box located next to the depth of field parameter is used to apply a small amount to the in focus area so that the transition between the in focus and out of focus areas look smooth.

Step – 10
Select the focal plane setup from the output drop-down; the depth of field information will be displayed in the rgb channels in the Viewer1 panel. Move the focal point to see the output properly, refer to Figure 7.

The red color represents the area (less than DOF) that is in focus. The green color represents the area that is inside DOF. If depth of parameter is set to 0, you wont be able to see green area in the viewport. The blue color represents the area that is greater than DOF.

Step – 11
Select the layer setup option from the output drop-down.

This option is similar to the focal plane setup option but it displays the DOF information after the depth is divided into layers, refer to Figure 8. When the automatic layer spacing check box is selected, the ZDefocus node automatically decides how many depth layers to be used based on the value specified by the maximum parameter. When you clear this check box, you can use the depth layers and layer curve parameters to control the numbers of layers and spacing between the layers, respectively.
art21-7
Figure 7
art21-8
Figure 8
Now, experiment with the controls in the ZDefous1 node properties panel until you get the desired result. Also, use the focal point widget in the Viewer1 panel to interactively change the focus point.

This concludes the part – 1.

Read Part - 2 here.

Tuesday, May 28, 2013

How to use Unpremult and Premult nodes in Nuke 7

In this tutorial, you will learn about the premultiplication and when to use it in your composition. When you composite CGI images, you must be aware of premultiplied vs unpremultiplies images otherwise some artifacts can appear such as dark edges around the composited CGI object. Also, some edge artifacts may appear after the color correction. Most the rendered images that modern day 3D applications produce are premultiplied. In such images,the RGB channel is already multiplied by the its alpha channel. Therefore, it should not be multiplied again while compositing it in post. If you are composting a CGI image having semi-transparent alpha pixels, all color pixels will be scaled down and thus become darker. While applying color-correction on a premultimplied image, you might get artifacts where semi-transparent areas exist in the image. To overcome this problem, you should first apply an unpremultiply operation and then premultiply the image again after color-correction. In Nuke, the Permult node is used to premultiply the input image. This node multiplies the rgb channels of the input image with its alpha channel. An input image that is not premultiplied is referred to as straight or unpremultiplied. If the black areas in the alpha channel are not black in the color channels, then the image is considered as straight. The Unpremult node is used to divide the rgb channels of the input image by its alpha. Lets first start with how the Multiply operation of the Merge node works in Nuke.

Step - 1
Navigate to the following link http://www.mediafire.com/download/ubzwukea7cql8w7/nt005.zip and download the zip file. Next, extract the butterfly.jpg and jet.tif from the zip file to your hard drive.

Step - 2 
Start Nuke and then create a new script by choosing File > New from the menu bar.

Step - 3
Hover the cursor over the Node Graph panel and press S; the Project Settings panel will be displayed in the Properties Bin. Make sure the Root tab is chosen and then select NTSC_16:9 720x486 1.21 from the full size format drop-down.

Next, you will import images to the script.

Step - 4
Choose the Image button from the Nodes toolbar; the Image menu will be displayed. Next, choose Read from this menu; the Read File(s) dialog box will be displayed. In this dialog box, navigate to the location where you have saved the butterfly.jpg and then choose the Open button; the Read1 node will be inserted in the Node Graph panel.

Step - 5
Make sure the Read1 node selected in the Node Graph panel and then press 1 to view the output of the Read1 node in the Viewer1 panel, as shown in Figure 1.
Figure tu5-1 The output of the Read1 node
Figure 1 The output of the Read1 node
Step - 6
Choose the Transform button from the Nodes toolbar; the Transform menu is displayed. Next, choose Reformat from this menu; the Reformat1 node will be added to the Node Graph panel and a connection will be established between the Read1 and Reformat1 nodes.

Step - 7
Select the Reformat1 node in the Node Graph panel and then add Transform node from the Transform menu; the Transform1 node will be inserted between the Reformat1 and Viewer1 nodes.  In the Transform tab of the Transform1 node properties panel, enter 90 in the rotate field and 0.56 in the b field; the output of the Transform1 node will be displayed in the Viewer1 panel, as shown in Figure 2.
Figure tu5-2  The output of the Transform1 node
Figure 2  The output of the Transform1 node
Step - 8
Click on the empty area of the Node Graph panel and then choose the Draw button from the Nodes toolbar; the Draw menu will be displayed. Next, choose Radial from this menu; the Radial1 node will be added to the Node Graph panel.

Step - 9
Press 1; the output of the Radial1 node will be displayed in the Viewer1 panel. Next, adjust the shape of radial ramp, as shown in Figure 3.
The radial ramp
Figure 3 The radial ramp
Step - 10
Make sure the Radial1 node is selected in the Node Graph panel and then connect a Multiply node with the Radial1 node; the input A of the Multiply node will be connected to the Radial1 node.

Step - 11
Drag-drop the Multiply node on the pipe connecting the Transform1 and Viewer1 nodes; the input B of the Multiply node will be connected with the Transform1 node.

Notice the result of the multiply operation in the Viewer1 panel. The result of the Transform1 node is gradually appearing darker from center to the edge of the frame. Next, you will use the Premult node. First, combine the RGB and alpha channels using a Copy node.

Step - 12
Delete the Multiply node from the Node Graph panel and then select the Radial1 node. Next, press K; the Copy1 node will be inserted in the Node Graph panel and the input A will be connected with the Radial1 node. Click-drag the input B of the Copy1 node to the Tranform1 node; a connection is established between the Copy1 and Transform1 nodes.

Step - 13
Make sure the Copy1 node is selected in the Node Graph panel and then press 1 to view the output in the Viewer1 panel.

Step - 14
Make sure the Copy1 node is selected in the Node Graph panel and then connect a Premult node to it from the Merge menu; the Premult1 node will added to the Node Graph panel.

You will notice in the Viewer1 panel that we the output is exactly same as that of the Multiply node. Figure 4 shows the node network in the Node Graph panel.
Figure tu5-4 The node network in the Node Graph panel
Figure 4 The node network in the Node Graph panel
Next, you will learn the workflow while color-correcting a premultiplied image.

Step - 15
Choose File > New from the menu bar to create a new script.

Step - 16
Load the jet.jpg image in the script; the Read1 node will be inserted in the Node Graph panel.

Step - 17
Add a Checkerboad node to the Node Graph panel; the Checkerboard1 node will be inserted in the Node Graph panel.

Step - 18
Select the Read1 node in the Node Graph panel and then press M; the Merge1 node will be inserted in the Node Graph panel.

Step - 19
Click-drag the input B of the Merge1 node and then drag the cursor to the Checkerboard1 node; a connection is established between the Merge1 and Checkerboard1 nodes.

Step - 20
Select the Merge1 node in the Node Graph panel and then press 1 to view the output of the Merge1 node in the Viewer1 panel, as shown in Figure 5.
Figure tu5-5  The output of the Merge1 node
Figure 5  The output of the Merge1 node

Step - 21
Select the Read1 node in the Node Graph panel and then insert an Add node between Read1 and Merge1 nodes.

Step - 22
In the Add tab of the Add1 node properties panel, select rgb from the channels drop-down and then specify a color value for the value parameter. You will notice that the adjustment is affecting whole image, refer to Figure 6. To overcome this, you need to first unpremultiply the result of the Read1 node and then premultily the output of the Add1 node.
Figure tu5-6  The affect of color correction
Figure 6  The affect of color correction
Step - 23
Select the Read1 node in the Node Graph panel and then insert a Unpremult1 node between the Read1 and Add1 nodes.

Step - 24
Insert a Premult1 node after Add1 node. Now, make color adjustments using the Add1 node. You will notice that the color-correction is now applied to the jet properly. Figure 7 shows the node network.
Figure tu5-7  The node network in the Node Graph panel
Figure 7  The node network in the Node Graph panel


Sunday, May 26, 2013

Basic composting in Nuke 7

The compositing of images implies combining multiple images to create a single seamless image. In this tutorial, we will create a simple composite using the Read and Merge Nodes. The nodes in the merge category are used to composite two or more images. Before we dive into the tutorial, lets first understand how the Merge, Premult, and Unpremult nodes work.

MERGE NODE
The Merge node combines two input images based on the transparency (alpha channel) using various algorithms. The alpha channel is used to determine which pixels of the foreground image will be used for the composite. This node takes three inputs: A, B, and mask. The A input is used to connect foreground image to the Merge node. This image merges with the image that is connected to the B input. When you connect an image to the A input of the Merge node, an additional A input will be displayed on it, refer to Figure 1.
Additional input A displayed on the Merge1 node
Figure 1 Additional input A displayed on the Merge1 node
 Each input is named in the order it was connected with other nodes, A1, A2, A3, and so on. It means that you can connect as many images as you need on the A side of a Merge node. NukeX copies data from the A input to the B input. If you disconnect the node connected to the A input, the data stream will still flow down as NukeX will use the B input. The mask input is used to connect a node to use as a mask.

The Merge node connects multiple images using various algorithms such as multiply, overlay, screen, and so on. To add a Merge node to the workspace, press the M key; the Merge# node will be inserted in the Node Graph panel and its properties panel will be displayed with the Merge tab chosen in the Properties Bin, refer to Figure 2. The options available in the Merge tab of the Merge# node properties panel are discussed next.
The Merge# node properties panel
Figure 2 The Merge# node properties panel
operation
The options in the operation drop-down are used to set the algorithm to be used for merging the images. By default, the over algorithm is selected in this drop-down. It layers the image sequence connected to the A input over the image sequence connected to the B input according to the alpha channel present in the A input.
Tip: To see the math formula for a particular merge algorithm, place the cursor over the operation drop-down; a tooltip will be displayed. This tooltip contains the information about the mathematics behind a merge operation.
When the Video colorspace check box located next to the operation drop-down is selected, NukeX converts all colors to the default 8-bit colorspace before compositing and then outputs them in linear colorspace. You can change the default colorspace for 8-bit files from the Project Settings panel. To do so, hover the mouse over the workspace and then press S; the Project Settings panel will be displayed. In this panel, choose the LUT tab; the Default LUT settings area will be displayed. Next, select the desired option from the 8-bit files drop-down, refer to Figure 3.
Partial view of the LUT tab of the Project Settings panel
Figure 3  Partial view of the LUT tab of the Project Settings panel
On selecting the alpha masking check box located next to the Video colorspace check box, the image is processed according to the PDF/SVG spec. According to this spec, that the input image remains unchanged if the other composited image has zero alpha. The calculation applied to the alpha will be according to the following formula: a+b-a*b. If this check box is cleared, the formula applied to alpha will be same as that applies to other channels.
Note: This check box will be disabled when it does not affect the operation selected from the operation drop-down or PDF/SVG.
set bbox to
The options in this drop-down are used to set the bounding box. The bounding box defines the area of the frame that is having valid image data. It is used to speed up the processing. By default, full image area is the bounding box of the input image but if you crop a particular input, the bounding box will be reduced to the cropped area. The default option in this drop-down is union, the other three are: intersection, A, and B. These options are discussed next.

union
The union option combines the two bounding boxes from the A and B inputs. It resizes the output bounding box to fit the two input bounding boxes completely.

intersection
When you select the intersection option, the output bounding box will be the overlapping area of the two input bounding boxes.

A
Select the A option to use the bounding box from the A input.

B
Select the B option to use the bounding box from the B input.

metadata from
The options in this drop-down are used to specify the node whose metadeta will flow down the process tree.

A channels
The options in the first A channels drop-down are used to specify which channels from the A input will be merged with the B input. The options in the second A channels drop-down are used to specify additional channel (alpha) to be merged with the B input. If you select none from the first A channels drop-down, the output of the A input will be black or zero. You can select check boxes on the right of the first A channels drop-down to select individual channels.

B channels
The options in the first B channels drop-down are used to specify which channels from the B input will be merged with the A input. The options in the second B channels drop-down are used to specify additional channel (alpha) to be merged with the A input. You can select the check boxes on the right of the first B channels drop-down to select individual channels.

output
The options in the first output drop-down are used to specify the output channels after the merge operation. The options in the second output drop-down are used to specify an additional output channel (alpha) after the merge operation. You can select the check boxes on the right of the first output drop-down to select individual channels.
Note: There are four check boxes on the right of the A channels, B channels, and output drop-downs, namely red, green, blue, and Enable channel, refer to Figure 4. You can use these check boxes to keep or remove the channels from the merge calculations, as required. When the Enable channel check box is selected, the channels selected from the drop-down placed on the right of this check box are enabled. This check box is available in the properties panels of many nodes.
Figure 4 The Enable channel check boxes displayed in the Merge1 properties panel
also merge
The options in the first also merge drop-down are used to specify the channels that will be merged in addition to the channels specified from the A channels and B channels drop-downs. The options in the second also merge drop-down are used to specify the additional channel (alpha) to be merged. You can select the check boxes on the right of the first also merge drop-down to select individual channels. These check boxes appear when you select option other than none in the first also merge drop-down.

mask
The Enable channel check box located on the left of the mask drop-down is selected when you connect a mask to the mask input of the Merge node or select a channel from the mask drop-down. The options in this drop-down are used to select the channel that will be used as mask. When the inject check box is selected, NukeX copies the mask input to the predefined mask.a channel. The injected mask can be further used downstream in the process tree. By default, the merge is limited to the non-black areas of the mask. When you select the invert check box, the mask channel will be inverted and now merge will be limited to the non-white areas of the mask. The fringe check box is used to blur the edges of the mask.

mix
The mix parameter is used to blend the two merged inputs. When the value of this parameter is set to 0, only the B input will be displayed in the Viewer# panel. The full merge will be displayed when the value for this parameter is set to 1 which is the default value.

PREMULT NODE
The Permult node is used to premultiply the input image. This node multiplies the rgb channels of the input image with its alpha channel. The alpha channel is used to determine which pixels of the foreground input image will be visible in the final composite. An input image that is not premultiplied is referred to as straight or unpremultiplied. If the black areas in the alpha channel are not black in the color channels, then the image is considered as Straight. Generally, most 3D rendered images are premultiplied. The Merge node expects premultiplied images so you should use the Premult node before any merge operation if input image is not premultiplied. This helps in removing artifacts such as fringes around a masked object. While color-correcting a premultiplied image, you should first connect an Unpremult node to the image and then perform color-correction. Next, connect a Premult node to get back to original premultiplied state for the merge operations. To add a Premult node to the Node Graph panel, select Premult from the Merge menu of the Nodes toolbar; the Premult# node will be inserted in the Node Graph panel and its properties panel will be displayed with the Premult tab chosen in the Properties Bin, refer to Figure 5. The options available in the Premult tab of the Premult# node properties panel are discussed next.
The Premult1 node properties panel
Figure 5 The Premult1 node properties panel
multiply
The options in the first multiply drop-down are used to set the channels (generally rgb) to be multiplied with the alpha channel. To select the individual channels, you can select the check boxes available on the right of the multiply drop-down. The options in the second multiply drop-down are used to set the additional channel to be multiplied with the alpha channel.

by
If you select the Enable channel check box located on the left of the by drop-down, the channel set in it (generally alpha) is multiplied with the channels set using the multiply drop-downs. The invert check box is used to invert the output of the alpha channel.

UNPREMULT NODE
The Unpremult node is used to divide the rgb channels of the input image by its alpha. To add a Unpremult node to the Node Graph panel, select Unpremult from the Merge menu; the Unpremult# node will be inserted in the Node Graph panel and its properties panel will be displayed with the Unpremult tab in the Properties Bin, refer to Figure 6. The options available in the Unpremult tab of the Unpremult# node properties panel are discussed next.
Figure 6  The Unpremult1 node properties panel
divide
The options in the first divide drop-down are used to set the channels (generally rgb) to be divided with the alpha channel. To select the individual channels, you can select the check boxes available on the right of the divide drop-down. The options in the second divide drop-down are used to set an additional channel to be divided with the alpha channel. The function of the by and invert check boxes is same as discussed in the Premult node.

TUTORIAL
In this tutorial, we will create a simple composite using the sunset.jpg, tree.png, and man stading.png files. Figure 7, 8, 9, and 10 display the sunset.jpg, tree.png, man standing.png, and the final output, respectively.
Figure 7 The sunset.jpg image
Figure 8 The tree.png image
Figure 9  The standing man.png image
Figure 10 The final composite
Step - 1
In your browser, navigate to http://www.sxc.hu/photo/1252649; a image will be displayed. Next, download and save the image with the name sunset.jpg to your hard drive.

Step - 2
Navigate to the following link http://www.mediafire.com/download/ob9on43alamlk0l/nt004.zip and download the zip file which contains the png files. Next, extract the content of the zip file to the location where you have saved the sunset.jpg.

Step - 3
Start Nuke and then create a new script by choosing File > New from the menu bar.

Step - 4
Hover the cursor over the Node Graph panel and press S; the Project Settings panel is displayed in the Properties Bin. Make sure the Root tab is chosen in it and then select NTSC_16:9 720x486 1.21 from the full size format drop-down.

Next, you will import images to the script.

Step - 5
Choose the Image button from the Nodes toolbar; the Image menu will be displayed. Next, choose Read from this menu; the Read File(s) dialog box will be displayed. In this dialog box, navigate to the location where you have saved the sunset.jpg and then choose the Open button; the Read1 node will be inserted in the Node Graph panel.

Step - 6
Make sure the Read1 node selected in the Node Graph panel and then press 1 to view the output of the Read1 node in the Viewer1 panel.

Step - 7
Choose the Transform button from the Nodes toolbar; the Transform menu is displayed. Next, choose Reformat from this menu; the Reformat1 node will be added to the Node Graph panel and a connection will be established between the Read1 and Reformat1 nodes.

Step - 8
Import tree.png and man standing.png files to the script, refer to step 5, the Read2 and Read3 node will be added to the Node Graph panel.

Step - 9
Make sure the Read2 node is selected in the Node Graph panel and then press 1; the output of the Read2 node is displayed in the Node Graph panel. In the Read tab of the Read2 properties panel, select the premultiplied check box.

Step - 10
Make sure the Read3 node is selected in the Node Graph panel and then press 1; the output of the Read3 node is displayed in the Node Graph panel. In the Read tab of the Read3 properties panel, select the premultiplied check box.

Step - 11
Select the Reformat1 node in the Node Graph panel and then press 1 to view the output of the Reformat1 node in the Viewer1 panel.

Step - 12
Select the Read2 node in the Node Graph panel and then press M; the Merge1 node will be inserted in Node Graph panel and a connection will be established between the Read2 and Merge1 nodes.

Step - 13
Drag the Merge1 node onto the pipe connecting Reformat1 and Viewer1 nodes. Also, the output of the Merge1 node will be displayed in the Viewer1 panel.

Step - 14
Insert a Reformat node between the Read2 and Merge1 nodes.

Step - 15
Select the Reformat2 node in the Node Graph panel and then press C; the ColorCorrect1 node is inserted between the Reformat2 and Merge1 node.

Step - 16
In the ColorCorrect tab of the ColorCorrect1 node properties panel, enter 0 in the gain field.

Step - 17
Select the Read3 node in the Node Graph panel and SHIFT select the Merge1 node. Next, press M the Merge2 node will be inserted in the Node Graph panel and a connection will be established between the Merge1, Merge2, and Read3 nodes.

Next, you need to crop and scale down the output of the Read3 node.

Step -18
Select the Read3 node in the Node Graph panel and then choose the Crop node from the Transform menu; the Crop1 node will be inserted between the Read3 and Merge2 nodes.

Step - 19
In the Crop tab of the Crop1 node properties panel, enter 120, 335, 955, and 1780 in the box x, y, r, and t fields, respectively.

Next, you will scale down and position the output of the Crop1 node.

Step - 20
Select the Crop1 node in the Node Graph panel and then add Transform node from the Transform menu; the Transform1 node will be inserted between the Crop1 and Merge2 nodes.

Step - 21
In the Transform tab of the Transform1 node properties panel, enter -853 and -845.4 in the translate x and y fields, respectively.

Step - 22
Enter 0.066 in the scale field.

Next, you will apply an overall color-correction.

Step - 23
Select the Merge2 node in the Node Graph panel and then press C; the ColorCorrect2 node is inserted in the Node Graph panel and a connection is established between Merge2 and ColorCorrect2 nodes.

Step - 24
In the ColorCorrect tab of the ColorCorrect1 node properties panel, expand the master area, if already not expanded. Next, choose the Channel chooser button corresponding to the gamma parameter and then enter 0.7614 and 0.48 in the g and b fields, respectively.

Step - 25
Save the composition. Figure 11 shows the node network used in the script.
Figure 11 The node network used in the script

Wednesday, May 15, 2013

Special of the month - Avail 50 % discount

Avail 50% discount on the following textbooks:

Adobe Premiere Pro CS6 - A Tutorial Approach
Adobe Flash Professional CS6 - A Tutorial Approach
The eyeon Fusion 6.3 - A Tutorial Approach

Now that’s some good deal to crack!

Read Node

This node is used to load images from the disk. This node converts all imported images to the native 32-bit linear RGB workspace. It supports file formats such as Cineon, TIFF, PSD, OpenEXR, HDRI, RAW Camera data, and so on. To add a Read node to the Node Graph panel, choose Read from the Image menu or press R; the Read File(s) dialog box will be displayed. In this dialog box, navigate to the desired file and then choose the Open button; the Read# node will be inserted in the Node Graph panel and its properties panel will be displayed with the Read tab chosen in the Properties Bin, as show in Figure 1. Various options available in the Read# node properties panel are discussed next.
Figure 1 The Read1 node properties panel

READ TAB
The options available in this tab are used to read files from the disk, set format, set proxy and proxy format, set frame range, and colorspace. These options are discussed next.

file
This parameter displays the path of the file which is loaded using the Read# node. To change the file, you can click on the folder icon located next to this parameter; the Read#:Replace dialog box will be displayed. Next, navigate to the desired file and then choose the Open button to replace the file.

cache locally
The options in this drop-down are used to set the option for the local caching in a specified folder. Local caching helps in faster reloading of the files. To set the location of the folder for local cache, choose Edit > Preferences from the menu bar; the Preferences dialog box will be displayed. In this dialog box, you can set the local cache folder by modifying the localise to parameter value. Next, choose the Save Prefs button to save the changes made and then close the dialog box. The cache locally drop-down has three options, namely auto, always, and never.

format
The options in this drop-down are used to set the size and pixel aspect ratio of the loaded image. By default, NukeX matches it with the size and pixel aspect information stored in the header of the loaded image.

proxy
This parameter is used to set path for the proxy file. Generally, a proxy file is a low res version of the full res file and is used when proxy mode is on and the required resolution is less than or equal to the size of the file.

proxy format
The options in the proxy format drop-down are used to select the size and aspect ratio of the proxy file.

frame range
The fields corresponding to the frame range parameter are used to set the first and last frames of the image sequence. There are two drop-downs corresponding to the frame range parameter. These drop-downs are used to set the behavior of the Read# node while calculating the frames outside the range specified for the fields. By default, hold is selected in these two drop-downs. As a result, NukeX holds the first and last frames for out of range frames specified by the first and last fields. Other three options available are loop, bounce, and black. The loop option is used to continuously loop the sequence for out of range frames. The bounce option is used to loop the sequence repeatedly back and forth for out of range frames. The black option is used to replace out of range frames with black frames.

frame
The options in the frame drop-down are used to set the frame mode. By default, the expression option is selected in this drop-down. You can enter an expression in the field located next to this drop-down. If the start at option is selected, the playback will not start until the playhead reaches the frame specified in the frame field. If you select the offset option, the frame displayed will be offset by the value specified in the field located next to the frame drop-down.

original range
The fields corresponding to the original range parameter are used to set the original frame range of the loaded images.

missing frames
The options in the on_error drop-down corresponding to the missing frame parameter are used to specify the action needed to be taken if the Read node encounters any error in loading the frames. By default, the error option is selected in the missing frame drop-down. As a result, NukeX displays No Such file or directory error message in the Viewer panel. If the black option is selected from the drop-down, the missing frame is filled with the black color. When the Checkerboard option is selected from this drop-down, the missing frame is filled with a checkerboard pattern. The nearest frame option from this drop-down is used to replace the missing frame by the nearest frame in the sequence. The reload button is used to re-read images from the disk.

colorspace
The options in the colorspace drop-down are used to specify the lookup table (LUT) that is used to convert values that NukeX uses internally. By default, the default option is selected in this drop-down. As a result, NukeX collects information from the header of the image. When the premultiplied check box is selected and alpha channel is available in the input image, NukeX first divides the color channels by the alpha channel before converting from the colorspace and then multiply by the alpha channel afterwards. This helps in removing artifacts from the input images. If you select the raw data check box, NukeX does not convert the data.

SEQUENCES TAB
The options in this tab are used to import a sequence script. These options are discussed next.

import sequence
This button is used to import a sequence script. This script builds a frame sequence list from an EDL file. On choosing this button, the Sequence File dialog box will be displayed. Next, you need to navigate to the script and then choose the Open button to import the script.

frame sequence
This field is used to access multiple sequences using the single read node where the naming of sequences does not follow the numeric sequence.

timecode
This parameter is used to display the timecode if it is included in the image. It displays timecode of the last opened file.

edge code
This parameter is used to display the edge code if it is in the image. It displays the edge code of the most recently opened image.

Tuesday, May 14, 2013

Removing Metadata

To remove metadata, choose the + button in the ModifyMetaData# node properties panel; a placeholder will be created in the metadata box. Next, double-click on the cell under action to display a flyout and then choose remove from the flyout. Invoke the Pick Metadata key dialog box as discussed earlier. Select the keys to be removed from the dialog box and then choose the OK button; the selected key will be removed from the metadata. To cancel an existing action choose the - (minus) button from the ModifyMetaData node properties panel.
Note: When you delete a key from the metadata, it only affects the ModifyMetaData node calculations. It does not alter the embedded metadata in the input images.

Editing Metadata

To edit metadata, in the ModifyMetaData# node properties panel, choose the + button; a placeholder will be created in the metadata box, refer to Figure art18-1. Next, double-click on the first cell under key column header; the Pick metadata key dialog box will be displayed, refer to Figure art18-2. In this dialog box, first select the key that you need to edit and then choose the OK button. Now, edit the value(s) and key(s) as required.

The ModifyMetaData1 node properties panel
Figure art18-1 The ModifyMetaData1 node properties panel
The Pick metadata key dialog box
Figure art18-2 The Pick metadata key dialog box

Adding Metadata


To add metadata, select the node whose metadata you need to add and then choose the ModifyMetaData node from the MetaData menu; the ModifyMetaData# node will be connected with the selected node and its properties panel will be displayed. In this properties panel, choose the + button from the ModifyMetaData tab; a placeholder will be created in the metadata box, refer to Figure 1.

Next, double-click on the first cell under the key column header; the Pick metadata key dialog box will be displayed, refer to Figure 2. Enter a new name in the field located at the bottom of the dialog box and then choose the OK button. Now, double-click on the first cell under the value column header and then enter the value in it; the new key and its value will now flow downstream.
The ModifyMetaData1 node properties panel
Figure 1 The ModifyMetaData1 node properties panel
The Pick metadata key dialog box
Figure 2 The Pick metadata key dialog box

Comparing Metadata

To compare metadata between the two inputs, add the CompareMetaData node from the MetaData menu and then connect the nodes that you need to compare with the A and B inputs of the CompareMetaData# node, refer to Figure art16-1. On doing so, the CompareMetaData node will display a list of keys where there is difference in the metadata of the two input images, refer to Figure 2.
Figure art16-1 The Read1 and Read2 nodes connected to the CompareMetaData1 node
Figure 1 The Read1 and Read2 nodes connected to the CompareMetaData1 node
The CompareMetaData1 node displaying  difference in the keys of the two input images
Figure 2 The CompareMetaData1 node displaying
difference in the keys of the two input images

Viewing Metadata

Metadata is data within the data. It is information such as original bit depth, width, height, and so on of an image which is embedded in it. NukeX reads the embedded metadata information and passes it down to the process tree. You can change the metadata information in NukeX and also embed the new metadata to an image. You can access metadata nodes from the Metadata menu which is displayed on choosing the MetaData button from the Nodes toolbar. In this section, you will learn how to view, edit, and render the metadata.

To view the metadata embedded to an image, select the node whose metadata you want to view and then choose the MetaData button from the Nodes toolbar; the MetaData menu will be displayed. Next, choose ViewMetaData from the menu; the ViewMetaData# node will be inserted in the Node Graph panel. You can view the metadata information in the ViewMetaData tab of the ViewMetaData# properties panel, as shown in Figure 1.
The metadata information displayed in the  ViewMetaData1 node properties panel
Figure 1 The metadata information displayed in the
ViewMetaData1 node properties panel
To filter the metadata list, you can use the search metadata for field in the ViewMetaData# node properties panel. To do so, enter a filter criteria in this field; the filtered information will be displayed in the ViewMetaData tab of the properties panel of the node. Fox example, if you enter input in the search metadata for field and then press ENTER; the keys and values having the word input will be displayed in the properties panel, refer to Figure 2. By default, filtering is done for both keys and values. However, you can limit it to keys or values by selecting the keys only or values only option from the within drop-down of the ViewMetaData# properties panel.
The filtered metadata list displayed for key input
Figure 2 The filtered metadata list displayed for key input
Tip: The keys can be referenced while writing expressions.
Note: 1. While viewing the metadata information of a QuickTime file, the ViewMetaData node does not display the gamma or bit depth, refer to Figure 3.
2. If you add the ViewMetaData node after the Merge node having two inputs A and B, you can specify the input whose metadata will flow downstream. To do so, select A or B option in the metadata from drop-down from the Merge tab of the Merge node properties panel.
The metadata of a QuickTime file displayed in  the ViewMetaData# node properties panel
Figure 3 The metadata of a QuickTime file displayed in
the ViewMetaData# node properties panel